Monday, September 30, 2013

The Great Bronco Engine Transplant-UH OH!-Part 2

If anyone has been reading my blog, you may have read this post:The Great Bronco Engine Transplant-UH OH!. In this post, I described how I discovered that my transmission cooler in the radiator had failed and deposited antifreeze in the transmission and transmission fluid in the engine coolant. Well, the saga continues.
 
I contacted the company that supplied the failed radiator and although they could not warranty it outright, they did sell me a new aluminum radiator at a very reduced price. While waiting for it to be delivered, I proceeded with more flushing. After buying the remaining 6 quarts of Type F transmission fluid from Walmart (I cleaned out their shelf) and three more from O Reilly, I once again drained the contaminated fluid from the transmission. This time the fluid came out looking more like "strawberry milkshake" instead of chocolate milk. It also did not appear to separate out any water.  So, nine more quarts of clean fluid went back into the transmission to be sacrificed at a later date.
 
Also while waiting for the new radiator, I decided to start flushing the engine coolant system. As suspected, there was quite a bit of transmission fluid in the coolant. I flushed several times with the old radiator over several days with flushing fluid added.  I ended up with 5 gallons of ugly contaminated antifreeze and water. I delivered 4-1/2 gallons of contaminated transmission fluid and the antifreeze to the Hazardous Waste Facility on Friday.
 
The new radiator arrived Friday. It is a beauty. But I immediately noticed that the transmission cooler is installed on the drivers side where the old radiator had the cooler on the passenger side. This caused two changes: 1. The transmission cooler lines will need to be extended and 2. The electric fan will need to be moved to the passenger side. Moving the fan is a complex item to figure out. Fortunately, two of my custom fan mounting brackets could be used as is, and the other two could be modified. The radiator also mounted differently which took some head scratching to come up with a new design for mounting brackets.
 
After three days of part time work, I started the Bronco this afternoon. As I had hoped, the aluminum radiator seems to control the temperature better. I flushed the radiator twice today, but I can still see transmission fluid in the water. I will probably flush it a few more times before I add antifreeze.
 
Of course, it is always something more! After parking the Bronco for the night, I noticed a puddle of water under the passenger compartment. Sure enough, the heater core had failed after only three years. I had suspected this, but when I looked at it a few weeks ago, I did not see any evidence of leakage. So off to the auto parts store and home again with a new heater core. After another 1/2 hour of work and the core was replaced. With only 5 screws to remove to access the heater core, this repair is a lot easier than what I did on the Mustang a few weeks ago: The Pony Car Project-I Can See Clearly Now
 
So what's next? First I need to extend the transmission coolant tubes to connect to the transmission cooler. Then more transmission flushing followed by a transmission filter change. A friend located 6 quarts of transmission fluid that was be closed out for only 11¢ per quart! That is a great buy, especially since it will probably be thrown away after a short service life..
 

The second draining of the transmission. This looked a bit more like "strawberry milkshake" in person.
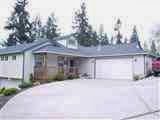
 The new radiator.
The radiator installed and the fan relocated.

BAD Was Bad At Brownsville This Year.

It was BAD at the Brownsville Marina on Saturday.  Before you think that something was amiss, "BAD" stands for Brownsville Appreciation Day and the slogan is "Bad Is Good". It is sort of a community fair for the Brownsville community at the marina. The marina was open to the public along with vendors, a classic car show, classic boat show, live music and eats.

What made this BAD so bad was record setting rain and winds all day. I went down for a short visit. I walked out on the breakwater to view the classic boats. Then a trip along the vendors, many who were unsuccessfully trying to stay dry. I drove up the hill to the car show where only 20 or so of diehard car owners were showing their cars. I thought about showing the Mustang, but I did not want to stay all day. Unfortunately, by the time I left, the crowds had not appeared.

 There were quite a few classic yachts that showed up.
 The vendors had a hard time keeping themselves and their products dry.
The diehard car owners showed up, but not in the numbers that usually attend. The field and parking area is usually packed at this event.

Friday, September 27, 2013

A Late Season Hike At Sunrise, Mt Ranier

All summer I had wanted to take a few days and go on a road trip for a few days and do some hiking in the Cascade Mountains. But the summer passed by without it happening. One of the hikes I wanted to do was in the Sunrise area of Mount Ranier National Park. I have hiked here a few times and for some time have thought about hiking a loop starting and ending at White River Campground. My plan was to hike from the campground up the Wonderland Trail to Sunrise, across the Burroughs Mountains, down into the White River valley and back to the campground. Since the weather on Thursday was suppose to be the best of the week and Friday was suppose to be stormy, this looked like one of my last chances.
 
I left my home at 0430 and after a quick breakfast at Enumclaw, I was at the White River Campground and ready to hike at 0739. I started  up the Wonderland Trail. I was nervous about this section. Unlike many of the other trails in the area, I had never placed my boots on this trail. As I suspected, it started going uphill from the start. I kept a constant pace and was not very winded. As this trail switch backed up the valley wall, views of Mt Ranier appeared through the fog and clouds. It was 34 degrees when I started, but got colder as I gained elevation. After 1 hour 40 minutes and 1900 feet of elevation, I reached level ground.
 
I then headed west toward the Burroughs Trail. After passing Shadow Lake, the climb began along the south flank of First Burroughs. It is a steady climb on rocky trails that run along exposed treeless slopes. This area is soon devoid of and forest and a sign says that it is very similar to Arctic tundra. After reaching the top, the trail was covered in a few inches of newer snow. Footprints indicated more hikers in the area and at the trail intersection at 7000 foot elevation, I stopped to talk to one and while I was stopped, several more showed up.
 

I soon was cold, so I started off for the final climb up to Second Burroughs. This climb always looks worse than it is and I soon found myself on the 7400 foot elevation. The view from here is spectacular! Mt Ranier is in your face to the southwest. Berkeley Park and Sunrise is north and east. White river is a ribbon of flowing water to the south. And Mystic Lake and Spray park is off to the west. An elaborate rock bench was built here, so with a comfortable place facing Mt Ranier, I ate lunch.
 
After lunch I continued on down the back side of Second Burroughs. The trail was soon covered in about six inches of snow, but it was still easy to follow from the tracks of a couple of hikers. I passed up the way trail to Third Burroughs and continued toward the Glacier Basin trail. The trail soon headed steeply downhill with numerous switch backs and a lot of large rocks to step down off of. As the trail descended, it went from rock to alpine meadows and the woods again.
 
I soon reached the trail to the White River Campground. A side trip up to Glacier Basin would have been fun, but unfortunately I needed to be home early, so I headed down the gently sloping trail arriving at the camp at 1400 after about 10 miles, 6 hours 20 minutes of hiking and 3200 feet of elevation gain.
 
This was a fun hike and I finally got over the fear of climbing from White River Campground to Sunrise. In the cold crisp air, the views were awesome. I felt fine afterwards and I knew the beating of my heart and deep breathing was from exercise and not like the panic attack I had a few days earlier.
 
 
 Here is my route starting and ending at White River Campground heading in a counter clockwise direction.
View of Mt Ranier from the Wonderland Trail.
The first sign. I headed left on the Sunrise Rim Trail towards the Burroughs Mtn Trail.
Where I came from: White River Campground.
Shadow Lake.
Headed right to  First Burroughs.
On the climb to First Burroughs, the fog rolled into the valley and at one point put me into a white out.
The rugged trail up First Burroughs.
The exposed flank of First Burroughs.
A little bit of snow on the top.
I headed to the left to Second Burroughs.
Mt Ranier from Second Burroughs.
Looking toward Berkeley Park.
White River where I started the day.
A "selfie" on the summit of Second Burroughs.
The snowy trail heading down the backside of Second Burroughs.
I headed right to Glacier Basin Trail.
The White River again.
I headed right toward the White River Camp.
 
Just a waterfall along the trail.

Tuesday, September 24, 2013

The Pony Car Project-New Gears

The pony car is really fun to drive and can accelerate well. Part of the reason for the great acceleration is the 4:10 gears in the differential. Someone changed the stock gears to this very low set. These work OK, but cruising at highway speeds has the engine turning at a higher speed than what is normal thereby decreasing gas mileage and increasing noise and vibration. Furthermore, I was concerned that the existing 4:10 gears were wearing as the pinion bearings seemed loose and there was some noise coming from that direction.

On Friday, I parked in front of a auto repair shop. One of the workers came out and told me that he had had a Mustang like mine only it was a 1988. He had rebuilt it including the motor. He showed me pictures and it did look nice. But it had been stolen. The insurance had paid him off and some of the parts had surfaced around the state. But as we talked, he said that he had a set of differential gears and the installation parts(shims, bearing, seals, etc).  He told me that the parts he had were brand new and still vacuum packed. He offered them to me at a really good price. I went home and checked parts stores and sure enough, he was offering me the parts for about $100 less then retail. The other cool thing was that these gears were 3.73 ratio which is what I wanted to change the Mustangs gears to anyway. The 3.73 ratio should give a good compromise of good acceleration and good highway cruising.

So Monday I called him and arranged to see the parts on Tuesday.  They were as he described, so I bought them. Overhauling the differential and changing the gearing is another project that I was hoping to do this winter.

 The install kit with bearings, shims and seals.
The ring and pinion gear set.

Monday, September 23, 2013

Movie Review-The Life of PI

Last week, I noticed that the Blu-ray disc for the "Life of PI" was at Costco for a low price. Since I did not see this movie in the theaters, I bought it. I was sitting at home Saturday night, kind of bored, so I thought it would be a good time to watch it. So down to my home theater for a viewing.
 
Overall, I really liked this movie. The quality of the video was excellent as was the photography and the special effects. The musical score was good and nice to listen to on my surround sound.
 
I am reluctant to say much about the plot for fear of ruining it for someone. But here goes. PI (you will have to watch this movie to know how he got this name) was a young boy raised on his fathers Zoo in India. As he grew, and became a teen, his family decided to move to Canada. They loaded their animals and themselves onto a ship for the voyage. In the Pacific Ocean, the ship foundered with PI and some of the animals the only survivors. One of the surviving animals was a full grown Bengal Tiger named Richard Parker. The movie moved to one of survival, faith and surrender.
 
I was especially moved when the Tiger(now the only surviving animal) tried to get onto the boat after a swim and could not. PI took pity on him and helped him even though the Tiger was more interested in eating PI. The Tigers eyes showed his fear and his hope for salvation instead of hope for a meal. As time went on, the two learned to live together.
 
I would recommend this movie.


Thursday, September 19, 2013

The Pony Car Project-I Can See Clearly Now...

What do I mean about seeing clearly? You would understand if you would have ridden with me in the Pony Car on Sunday. The inside of the windshield would not clear even with the defrost cranked up to it's maximum  temperature and air flow. Why would this be? Well, the heater core was leaking (and has been for sometime) and blowing moist, coolant saturated air on the windshield instead of warm dry air.
 
The Foxbody Mustangs have an issue with heater cores leaking. Some think it is the stress put on by excess coolant pressure and recommend a flow restrictor. Others say that it has to do with heat cycling. What I do know is that every small Ford vehicle I have owned has needed the heater core replaced. The Ranger was leaking when I bought it in 1995 with 104000 miles. The Bronco lasted 170000 miles and 26 years. And I knew the Mustang's was leaking shortly after I bought it and some people say that you should only expect about 66000 miles before failure. So an owner can get the fogged up windshield and another symptom of failure known as the "green pool" on the car floor. I did not have the "green pool" yet, but I was getting some wetness from the dripping coolant. All these vehicles had extremely similar appearing heater cores. The Ranger and Bronco heater cores were very easy to change. The Mustang's is not easy.
 
So this week while waiting for parts for the Bronco (The Great Bronco Engine Transplant-UH OH!), I decided to tackle replacing the Mustang's heater core. I had done some research and knew this would not be an easy job. I had to remove the console, radio, dash and instrument pod. Just finding some of the screws was difficult. And some of the screws were missing, some of the plastic parts were cracked and screw holes ripped out. So I had more work to do then just the heater core. The heater core is located forward of the windshield under the cowling. This heater core had been changed at least once. How do I know? The back of the box that holds the heater core had been cut off to allow the core to be removed easier. This is a mod that is talked about on the Internet. The detached part is then duct taped in place.
 
I started this on Wednesday afternoon and finally got the core out Thursday morning. By the afternoon, I had most of the dash parts and the instrument pod reinstalled and the car is at least drivable. I am painting some of the console parts and I had to drive to Lowes to get some more screws, so everything should be installed on Friday. 
 
 The dash loose and laying over the steering wheel.
 This is the old heater coil. Note how the fins on the top and bottom are exposed and are damaged. This is where I have seen them bulged and cracked. The new one had reinforcing bars over these areas that protect the soft fins and tubes. A much better design!
What a mess! As one person in a video said, "this job is not for the faint of heart!"

Monday, September 16, 2013

The Great Bronco Engine Transplant-UH OH!

For those not familiar with my blog, I write about a variety of my interests. One project that I blogged about between October 2010 and April 2011 was a project to replace the small V6 engine in my Bronco II with a larger 302 cubic inch V8 engine and automatic transmission. It culminated in this post: The Great Bronco Engine Transplant-Final Installment ,although I continued to post sporadically as I continued on this project. For those interested, if you go to the "Final Installment" and continue to older posts, much has been posted about this project.

Recently, I have been noticing the Bronco's transmission seemed to be leaking. I started preparing myself to remove the transmission and repair what was wrong. But I then noticed two more strange things, fluid seemed to be coming out of the transmission vent that I had mounted on the firewall and the fluid was dark in color instead of pink. This may have been the source of the leak. So, last week I disconnected the transmission hose that runs to the transmission fluid cooler in the radiator and anti freeze drained out. This was not good! There has to be a leak in the cooler. I looked at the antifreeze in the engine and sure enough, it looks like there is transmission fluid in the coolant.

So today I drained some transmission fluid out of the transmission. Fortunately,  I had installed a drain plug in the pan. The first fluid out was clear antifreeze/water before dark colored transmission fluid started coming out. I isolated the cooler and started the Bronco to warm up the transmission. After warming it up, I drained the transmission and torque converter(fortunately it also has a drain plug). Most of what came out looked like chocolate milk. After thoroughly draining, I refilled with nine quarts of new Type F transmission fluid. This is only for flushing. My plan is to change it out with another fill of new fluid followed by a filter change and the final fill of synthetic transmission fluid. Lots of transmission fluid will be used during this evolution. I am hoping that no permanent damage has been done to the transmission and the leak was actually fluid blowing out of the vent..

In addition to the flushing, I also need a new radiator. The current one is actually the second radiator since I changed engines. The first had a visible leak almost immediately and the company warrantied it. The current radiator is two years old. I have contacted the company to see if there is any warranty value left. If there is still a warranty, I will try to upgrade to an aluminum radiator that they also offer. If there is no warranty, another company offers the same aluminum radiator for a cheaper price. Either way, when I get a new radiator, I will need to flush the engine coolant too!
 Nine quarts of Type F transmission fluid standing by to give their lives to the flushing process.
 About a gallon and a half of chocolate milk colored transmission fluid drained from the torque converter. It should be pink in color.
The gallon of contaminated transmission fluid drained from the transmission pan. Notice the water/antifreeze mixture in the bottom.

Wednesday, September 11, 2013

The Pony Car Project-More Bling

This month, Late Model Restoration was advertising a sale on interior items. For some time I had a hatch carpet and floor mats on my "wish list". The sale prices on these items was good, so I could not resist and I ordered them.
 
They arrived today, a day late from what the original tracking information said would be the delivery date. As soon as they arrived I removed the old hatch carpet and installed the new carpet and floor mats. I elected to spend a bit extra and get the carpets and mats with the embroidered mustang logos. I SMUGLY think that these logos add to the vehicle even though they could be considered "bling"
 
Something else that came with this order is a new speedometer cable gear. Since someone messed with the gearing and wheel size of this vehicle, the speedometer reads much faster then the actual speed. Not a big problem because I am probably driving slower then the legal speed most of the time. But I did the appropriate calculations and ordered a new gear that should get the indicated speed closer to the actual speed. It is too hot to crawl under the car and fix this today!


Here is the new hatch carpet and front seat floor mats. There is also a set of rear seat floormats, but they are just simple black carpet squares, no logos. 
 The traditional running horse/tricolor bar Mustang logo embroidered into the carpet material.
The hatch area looks a lot better with the matching color carpet. It may take some time for it to lay down smooth.
 This is the removed, disgusting, grey oil soaked hatch carpet. It might have been the source of some odor too!
While I was at it, I found a hatch trim panel on Ebay to close up the large opening in the underside of the hatch. These seem hard to find with wildly varying prices. I found this black one in South Carolina for a good price with free shipping. It is in good condition and does not require paint or touch up. This fixes what appears to be another one of the "when we took the car apart and put it back together, this part was missing so we left it out" issues.