Wednesday, August 28, 2013

Sailing Dreams

What sailor doesn't dream about a new or different boat, about the perfect fast run or maneuver, or the perfect cruising destination? Most of these dreams would probably be considered "day dreams" rather than dreams that occur during deep sleep.

But sailing dreams do occur during sleep. I have had many and have heard from other long time sailors about their dreams. But a lot of my dreams really don't make much sense and I really don't try to analyze them. One recurring sailing dream has to do with sailing my boat around on the streets of a city. It is a strange feeling to have the boat perched on it's keel and sailing on pavement. And it feels real! The height of the boat above the ground, the movement and eventually relaunching back into the water from a launching ramp. For some reason, this recurring dream is based in Tacoma, a place I really don't frequent much. After talking with several long time sailors, I find that some have had a similar dream only in different cities.

So why do we have non sensecal sailing dreams? I am not qualified to analyze these, but I do remember reading about similar issues that people had following a cruise. It was written that people who spend time on the water often have trouble releasing their tensions when they get home. This occurs more with the person in charge. I have heard that the Volvo Ocean Race crews have a hard time unwinding after a grueling leg. I suppose that it could be considered a mild form of PTSD.

My dad had dreams after he came home from a season of commercial fishing in Alaska and even after a couple of weeks of cruising with the family on board. He would actually sleep walk, shine a flashlight out the window and mumble about the anchor dragging and the boat heading for the rocks. He does not remember this, but it often scared my mom.

So Monday night, I had a strange sailing dream. What made it very strange was that I have not been on my boat for a couple of weeks and the dream was based on another boat.

This actually started with an Ebay auction. Something I wanted on Ebay was closing at 0419. So to do a quick fly in and last minute bid, I set the alarm for 0400. Probably in anticipation of getting up at 0400, I was having a hard time staying asleep. But I finally did fall asleep and then "The Dream" started:

I was somewhere on top of a hill that was dry and dusty. A Japanese guy rolled up in a car pulling a race car on a trailer. I chatted with him for a while and then we launched into a sailboat race. I was on a boat that I had recently raced on and we were racing against other boats like ours that were sailed by Japanese guys. We were sailing up a winding road toward what appeared to be a stadium. It was strange, we were jibing up the road with the spinnaker. We were jibing with the hull against trees, power lines and power poles. The spinnaker was taking an immense amount of abuse as it was getting plastered against all the obstructions along the road and I could see that the leech was tattered. Yet, we were fast and absolutely killing the other boats. And while we were racing, my mom made an appearance and was concerned about where I parked my car in a parking lot next to the road we were sailing on. Everything was so vivid! Then the 0400 alarm went off...

What would this dream mean? I have no idea. I think most of my dreams are just a way that my brain is relaxing and taking a "field trip" somewhere. And sailing is a big part of my life, it seems like a logical place to "go". And the Ebay bid was a success! I was the only bidder on a cool item, bought it for the minimum bid(there was no reserve) and saved about $75 under a "buy me now" or store price. And free shipping! And no tax!

Monday, August 12, 2013

Shaw Island Classic Race

Once again it is August and it was time to take the boat to Friday Harbor to race in the Shaw Island Classic. This is a race from Friday Harbor around Shaw Island, either direction. This race is sponsored by San Juan Island Yacht Club and this is the 43nd edition of this race, the fourth for me.

It is about 63 NM from Brownsville to Friday Harbor. Since this was a year with good currents for heading north, I made the decision to make the delivery run in one day. Furthermore, I had a friend along to crew and he could only get one day off. We were underway at 0420. The run north was great, after passing Kingston, we started getting a boost from the current. By the time we passed Point No Point and entered Admiralty Inlet, we were getting several knots of boost from the current. But we also encountered fog, very heavy fog with about 200 yards visibility. We did not see any land from Point No Point until just before we reached the south entrance of San Juan Channel. We tracked ships around us with the chartplotter and AIS(Automatic Identification System) and easily kept away from traffic, except for a US Navy shipped that that only announced it's presence with a fog horn.

We arrived in Friday Harbor at about 1330 and had a slip assignment about an hour later. Note to self: Try to get reservations earlier! We secured the boat and explored the town. I have been to Friday Harbor many times and it is one of my favorite places in the San Juan Islands. Still there is always something new to see!

Saturday we woke up early and hiked up to the Rocky Bay Café for their fantastic breakfasts. Then back to the boat to get ready. Our start was not until 1215, so we had lots of time to rig the boat and kibitz with old friends and new acquaintances. We left the dock in plenty of time to get the sails raised and tweaked before my start.

It did not seem to be as crowded in the starting area as I remembered. The line is set off the north end of Brown's Island. The wind in the channel was out of the south at about 5 knots, but in the starting area under the lee of the land, it was light and shifty.  As the first start went off at 1200, most of the fleet went counter clockwise and only a couple headed clockwise. About the same happened at my start. We decided to go counter clockwise as my detailed analysis determined  that that was the way to go. Yeah Right!

Our start was hectic. Just as we timed our start right and found a nice hole to shoot through, a boat late from the first start port tacked us and forced us to go around them. After wiggling clear of the line, we headed for Upright Channel and soon the wind came aft enough to set the spinnaker. We hugged the Lopez Island shore and found some wind when the wind started evaporating all over the course. We rounded the east end of Shaw Island in a really great position ahead of most of our class. But the convergence zone struck and the wind died. Boats from behind caught up to us and some passed us. After working and drifting through the fluky conditions, the wind finally filled in from the south and we reached through Harney Channel, Wasp Pass and sailed close hauled into San Juan Channel. The wind was up to about 10 knots now. We had a great beat and worked the eastern half of the channel passing many boats and distancing ourselves from the pack behind. We were on the the final tack to the finish with only about a quarter of a mile to go when the wind died and then changed to the north. We stopped and the boats behind caught up some. We finally crossed the line and when the results were calculated, we were in fourth in our class. We missed third by 1.8 minutes!

We cleaned up the boat and went to the club house for dinner and the awards. I was very tired and dehydrated. I drank lots of water followed by their traditional lasagna dinner. San Juan Island Yacht Club puts on a great race and post race event. They are always friendly and seem happy to see me. The complete results are here: Shaw Island Results 2013

On Sunday, after another breakfast at Rocky Bay Café, we got underway for the transit home at 0747. This was predicted to be a long trip with adverse currents for most of the way back to Brownsville. Sure enough, half way across the Strait of Juan de Fuca, we started bumping into the ebbing current and our speed was reduced to about 3 knots. Instead of the usual track down Admiralty Inlet, I elected to head to Pt Wilson and try to avoid the current. But as I was navigating I thought about transiting through the Port Townsend Canal on the west side of Indian Island. The current flow through this canal varies differently from the flow in Admiralty Inlet. While we would have been fighting ebb current east of Marrowstone Island, in the Port Townsend Canal we could see two knots of flood going our way! We gained several miles on boats that went down Admiralty Inlet. I have always been reluctant to go this way because I though it was farther than the direct route. But when I downloaded the tracks, I found that it is only about one half mile farther than what I thought was the direct route. Learn something new everyday! And since the J35 does not have a very tall mast, we fit easily under the bridge. Larger boats with taller masts may not fit and need to evaluate their "air draft" before trying it.

The rest of the trip was uneventful and we soon arrived at Brownsville at 1830, a lot quicker than I thought it would be.

 The dark spot in the fog is a US Navy frigate. We came kind of close to them.
 The Friday Harbor Marina. We were somewhere in that mass of sailboat masts.
 Mt Baker
 Reaching through Harney Channel.
 In Harney Channel off Orcas.
It rained some Sunday morning. Jim was driving the boat.

The Pony Car Project-Feeding The Beast

The Mustang runs on gasoline, 87 octane unleaded gasoline. And it runs pretty efficiently. It has plenty of power and yet it gets good gas mileage. But since I have owned it, I knew that it was probably being starved. One of the first tests that I did was to check the fuel pressure. It was lower than the specs allowed. This may have been why it had a hesitation when accelerating and would sometimes not start when it was cold. Fuel pump failure and degradation is not unusual on these cars.
 
So I ordered a fuel pump kit from Late Model Restoration. The kit included almost everything I needed. In addition, I did order a new filler pipe seal, new lockring and a fuel line tool kit. The pump I bought was a larger capacity pump than stock and is rated at 190 liters per hour(lph). This was recommended and also a prudent thing to do.
 
I started this project about 1 pm and was finished by 3:30. It was clumsy trying to remove the tank and balancing it on the floor jack. Only two bolts and straps hold the tank to the car. The hoses and wiring was easy to disconnect. The new pump installed easily into the existing bracket and I hooked up the new hose and connector.
 
The reinstallation was also  awkward to pull off. This time not only did I have to balance the tank on the floor jack, I also had to force the filler pipe into the new, tight seal. I finally got the tank into position and secured the straps around it. Again, the hose and electrical connections were easy to complete. Fortunately the tank does not weigh much and it was nearly empty of gas.
 
The Mustang started right up and I checked the fuel pressure. Now the pressure was right in the middle of the acceptable range and it did not fall off when I revved the engine. I took the Mustang out for a drive and as I had hoped, it did seem to run better. The hesitation seems to be gone and the car accelerates much stronger. Furthermore it seems like less throttle is needed to cruise at speed. Feed it and it will run!
 The fuel tank has to be removed to access the fuel pump.
 The fuel pump assembly removed from the fuel tank. The bracket, hoses and flange are reused.
The fuel pump kit: pump, hose and clamps, wiring pigtail, lock ring, filler pipe seal and filter sock.

Monday, August 5, 2013

The Pony Car Project-A Place To Rest My Head

When I bought the Pony Car, I knew that there was a lot of missing parts. It seems like someone took the car apart and then lost  a bunch of the parts and then when they put it back together they just left out the missing pieces.

Another curious thing is that the black interior may be the third color for this car. The first color was probably grey. After the grey, it looks like pink was used. Yes pink! Pink is showing through some of the parts that have been recoated to the current black color. Someone did try hard to make the current interior all black and replaced many of the interior pieces with new black components or painted parts black. I have painted some of the interior parts to match. The paint I used was made for interior and even soft parts like armrests.

It also looks like the seats have been recovered recently with new material and are in great shape. BUT, in true "if it is missing, don't replace it" fashion, there are no headrests. There are not even any holes in the top of the seats for head rests. To me this is a safety issue. I have been in a rearend collision and I know how whiplash feels. Also this car has a drivers side airbag that could push my head back if it deployed. A few months ago when a guy approached me in the Lowes parking lot with an interest in the Mustang, the first thing he said was "where are the headrests?". I did not have a good answer for him.

So, I searched Ebay and found replacement headrests in the appropriate black color. That was the easy part. The real problem was that the headrests don't just plug into the seat, another part called the guide sleeve is needed to plug into the seat frame and then the headrest slides into it. Those did not seem too available.  After some more searching, I did find the appropriate hardware. Both the headrests and guides came from Venice Florida but from two different salvage companies. The funny part is that both companies seem to share the same email address. Strange! And the sleeves arrived in about four days and the headrests took a week and a half.

The install was easy, but the cutting of a slot in the upholstery was nerve wracking! In the back of my mind I kept thinking "what if I cut in the wrong place? or the seats are not really made for the headrests?". I could feel a "void" where the headrest should go, so I took a chance. I hit the right location and the sleeve slipped securely into the slot in the seat back and was followed by the headrest.

So, a side benefit of replacing the headrests was that my searching on Ebay led me to three used parts companies that specialize in Mustang parts. I bookmarked these companies. One has the hatch trim panel that I also need. It is on my watch list.....


Nice! I have headrests now!

Tuesday, July 30, 2013

The Pony Car Project- It Is Always Something!

Today I drove to Harbor Freight in Tacoma. I elected to take the Mustang. It was a nice drive to Tacoma until I exited the freeway and could not shift out of gear and after a complete stop could not shift into any gear. It was then that I noticed the clutch pedal was loose and mushy. I got under the hood and tightened the clutch cable with the manual adjuster. Did it just loosen on the drive over? No, by the time I drove the short distance to Harbor Freight, the clutch was loose again. It seemed like the cable casing was pulling through the end stop.

I completed my shopping and went back to work on the car. I could tighten the adjuster, but a few cycles of the clutch pedal and it would be loose again. I finally ran out of adjustment. So I placed a couple of spring clamps that I had just bought at Harbor Freight in the space between the adjuster and the normal end of the cable. Now the cable housing was tight. It worked and I managed to drive home. I did try to take the route home with the fewest stops and the least traffic and kept my shifting to a minimum.

So I drove the Bronco to the auto parts store and got a new cable. The old cable came out easy and the new one started going in easy, but it seemed to come up short. After some messing around, I found that I had to brace the pedal hard all the way out in order to get the automatic clutch adjuster(it doesn't work anyway) to release so that I could pull enough slack in the clutch end of the cable to connect it to the clutch release arm. Seems to work smoother now too!

It is always something!
The new cable. It is covered with a heat shield which is a nice touch since it runs right by the headers. 
 Old and new cables.
The failure. The inner casing and wire reinforcement pulled out of the end connection. I wonder if heat contributed to this.

Monday, July 29, 2013

Mustangs On The Bay and MOPAR Madnes

Sunday there was two car shows in the area. I knew about the "Mustangs on the Bay" show, but a friend at church told me about the MOPAR show in the Lowe's parking lot. So after church I went to both. MOPAR stand for Motor and Parts of the Parts, Service and Customer Care organization within Chrysler Group. Among car enthusiasts it refers to any car manufactured by the Chrysler Group (Chrysler, Plymouth, Dodge and others) (http://en.wikipedia.org/wiki/Mopar).
 
I went to the MOPAR  show at Lowe's first. I attended this show last year too. This year there did not appear to be as many cars as last year. But there was still a good spread of cars from old to new and stock to modified. They did a good job of segregating the cars into types and eras.
 
 
After the MOPAR show, I drove to Port Orchard for the Mustangs on the Bay show. I have never been to this show before, but I understand that it is always the weekend two weeks before the other car show, The Cruz. As the name implies, this show was all Mustangs. It filled up almost the entire parking area on the waterfront around the marina. Almost as much as the complete Cruz show. Like the MOPAR show, the cars were parked in order of style, generation and model. That worked well until I thought I had looked at a generation of Mustang only to find there was another section that had sub models(like Cobra or Shelby). Still, it was fun to see all the iterations of the Mustang design and how people have worked hard to keep these cars alive.
 
I spent quite a bit of time looking at the Generation 3(1979-1993) Foxbodies like mine. There was probably about 20 of them scattered through the various sections with about a dozen parked in a row. Some of them were pristine and some not so much. I smugly thought, "mine doesn't look so bad"! I was able to see how some of my missing parts are supposed to be installed and also get idea for future mods. When I got home, I started searching Ebay and located some of my missing interior parts.
 
 Lots of MOPAR's lined up in front of Lowe's.
Lots of MOPAR's lined up in front of Lowe's 
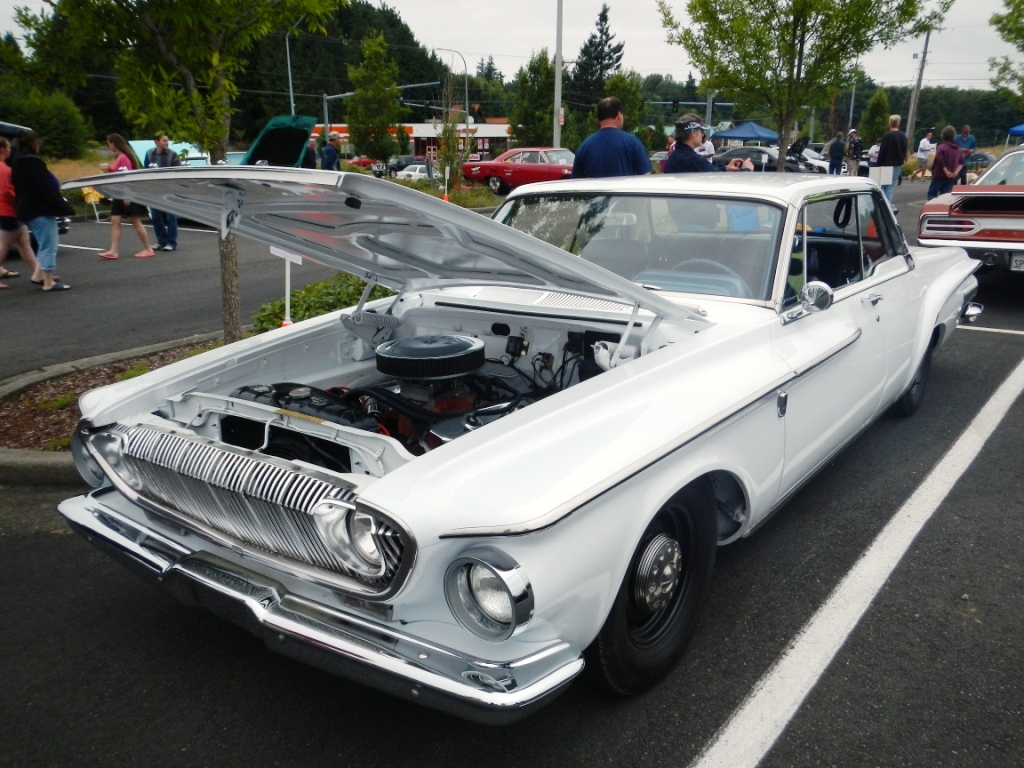
 I believe that this is an early 60's Savoy. But with a big V8 and 4 speed, it was an early muscle car.
The Savoy had a 413 CI V8. It had big cable straps holding it down against the torque. Check out the high rise, cast iron headers. 
 I always like this Dart body style from the early 70's. This was a nicely restored example with a 340 V8 and an aftermarket 5 speed.
 A whole row of Generation 3 Foxbody Mustangs like mine.
I wished mine looked like this! This is a 92 that is heavily modified. 
The 92 had a 5.0 liter V8 with a lot of performance mods: aftermarket heads, manifolds, supercharger and even nitrous oxide. 
This is the "modified" section. Most of the cars here had heavy aftermarket mods done to them. 
 Generation 4 and 5 Mustangs lined up.
 Retired 1991 Police pursuit car. Ford made these for some states for special purpose cars. California ordered 400 at one time. Very similar to mine with the 5.0 V8 and 5 speed, but this is a notchback coupe with beefed up frame, extra alternator for the radios and a 160 MPH speedo!
The MACH 1 section.

Thursday, July 25, 2013

Pulling Out The Sliver

We have all had a sliver embedded in our flesh. And we all know how good it feels to have it removed. Well, this post is not about that. The Sliver I am referring to is a boat. This boat is a 62foot sailboat designed by Robert Perry. From it's beginnings, it has been referred as the Sliver class daysailer, it's actual name will be different. It is very narrow and is double ended with a minimalistic interior. Much has been written about it on this forum: Perry Sliver Class Day Sailor. The Sliver has been under construction at the Northwest School of Wooden Boatbuilding for the past two years. Today it will be pulled from the shed, loaded on a trailer and taken to a boat yard in Seattle for finishing.

Partly to stay out of the way and also to get a ride in, I elected to ride one of the bicycles from the Hood Canal Floating Bridge to the schools facility in Hadlock. When I arrived at 0845, there were already a lot of people around but no truck. The truck arrival time was 0900. I met Kim, the owner, Robert Perry, the boats designer, Neil Rabinowitz, a renown marine photographer and many of the folks that have been following and commenting on this build on Cruising Anarchy.

The loading of the boat seemed to go smoothly and by 1045, it was on the road heading for Seattle. I headed for home and had a nice ride back to the truck.

And tweezers were not required for pulling out this Sliver!

 Kim looks pretty excited!
 Lifting the hull to clear the truck trailer.
 There was a lot of interest in the loading process.
 The chain falls and straps removed from the overhead, the last attachment to the schools shop.
 Associated Boat Hauling did a great job of maneuvering the rig around.
 Out of the shed and everyone got their first views of the shape out in the open.
 
Ready to roll.